Before you splash out on a new hat for that special occasion coming up, consider making your own fascinator instead. You’re unlikely to find a store-bought hat or fascinator that suits your style as well as any you could design yourself.
It’s not as hard as you might think to make your own fascinator. Whether you’re a dab hand at millinery or a complete beginner, this is something anyone can do. Read on to learn how to make a simple fascinator.
What is a fascinator?
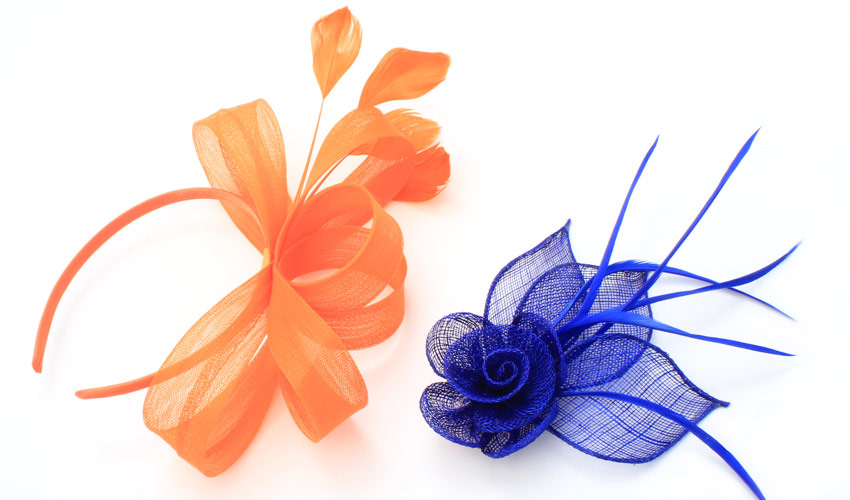
A fascinator is a decorative headpiece typically worn at formal occasions such as weddings, race days, and other special events.
Made famous by Royal Ascot’s fashionable following, fascinators come in various sizes and colours to suit the style of the wearer. They are incredibly versatile, from small and understated designs to larger, more extravagant pieces.
What materials do I need to make a fascinator?
To make your fascinator, you will need:
- - A base disc
- - A plain headband or plastic haircomb
- - Needle and thread
- - Hot glue
- - Feathers, ribbon, and other accessories
- - Dressmaking pins
- - Material (crinoline and/or sinamay are ideal)
Crinoline and sinamay are two of the most popular materials for making fascinators and hats.
> Crinoline, or ‘crin’, is a type of synthetic netting that comes in various sizes and colours. Crin doesn’t fray, which makes it perfect for DIY fascinators.
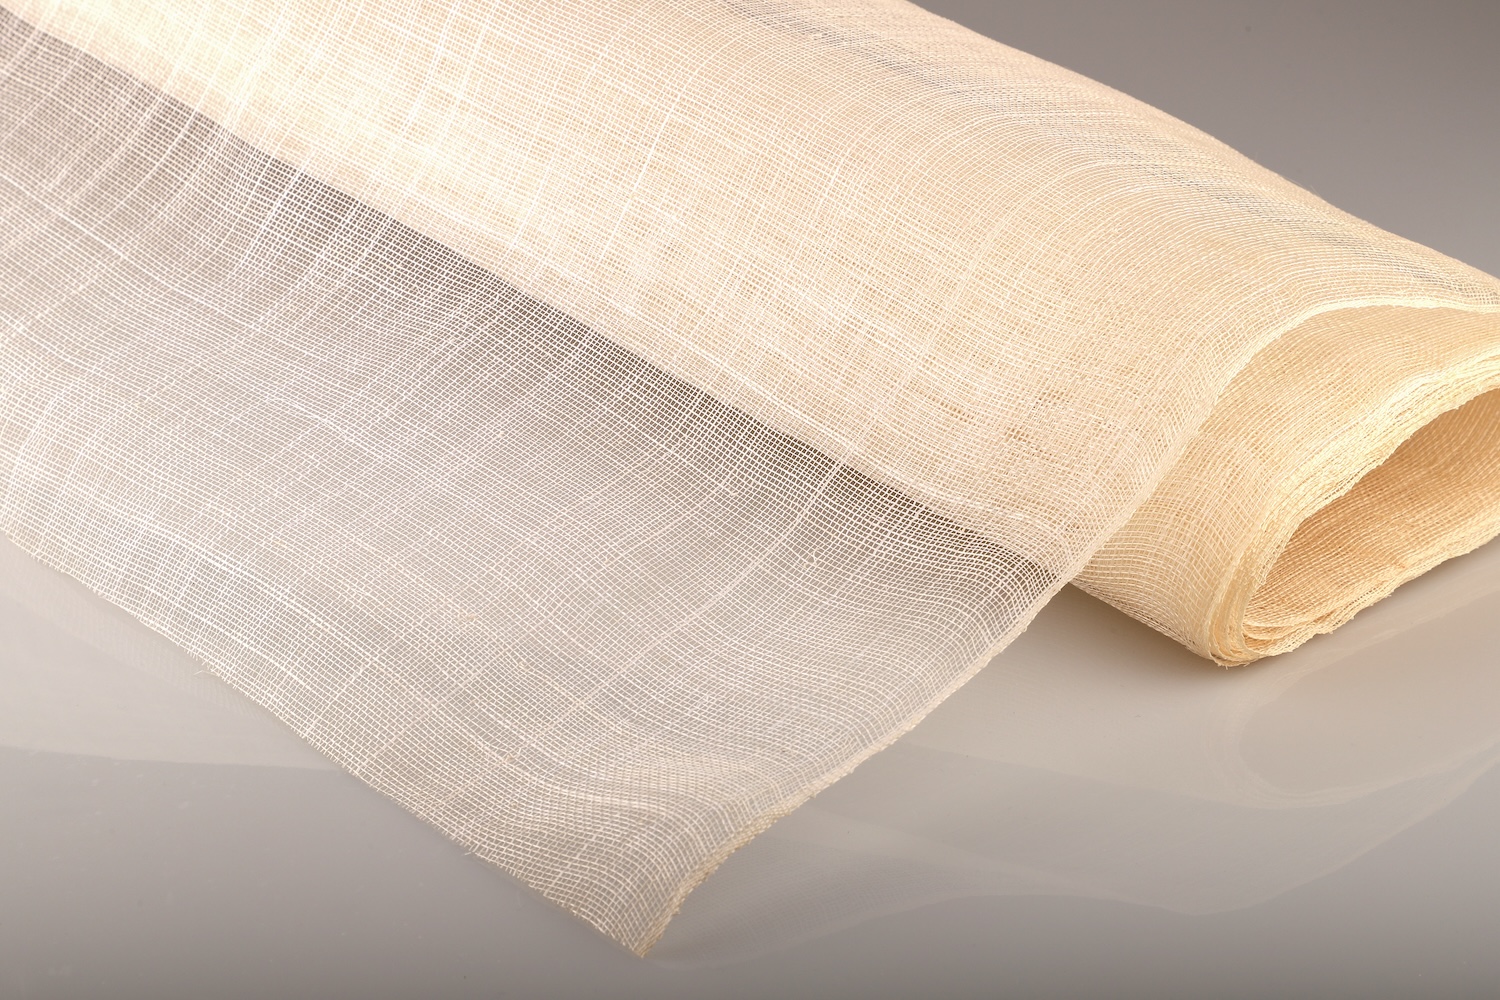
> Sinamay (pictured below) is a straw fabric comprised of abaca fibre, a natural plant extract. It’s lightweight, pliable, and tough, ideal for hat-making.

Where to buy fascinator materials
The basic materials needed for making fascinators are widely available on the high street.
Most good craft shops sell hot glue, feathers, ribbons, and other embellishments. You might also find crinoline and sinamay there; otherwise, try a haberdashery or fabric store.
You could also buy your fascinator materials online from a retailer like Inca.
How to make a fascinator step-by-step
Before you start making your fascinator, research what’s already out there. Do you want big, small, elaborate or refined? When you see something you like, save a picture of it to use later
If you’re on Pinterest, create a board and pin any ideas you find to look back on later.
Keep in mind the outfit you’ll be wearing with your fascinator. This is a good place to start, and you can use it as a jumping-off point for selecting your colours.
Step 1: Start with the base disc
A base disc is a circular piece of material. You can buy one or make your own. This crucial bit of material is the base for the rest of your fascinator.
For a different look, skip the base disc and attach all of your fascinator parts directly to your headband.
Step 2: Add your fabric
This next step is where you start to build up the structure of your fascinator using folds of material (crinoline is ideal for this job).
Stitch each fold of fabric individually, then sew or pin it to the base disc. At this point, you might also want to add loops of ribbon.
Slowly build up layers of material, thinking about the overall shape of your fascinator as you’re going.
Step 3: Attach feathers and flowers
Next, attach a spray of feathers or flowers (or both) to your fascinator using hot glue. This will give your fascinator height. Remember to keep within the colour scheme of the overall headpiece.
Step 4: Add the final touches
Stitch or glue the final embellishments to your fascinator. Choose from beads, sequins, pearls, or jewels.
The great thing about making your own fascinator is that anything goes, so you can use up whatever odds and ends are left over in your craft box!
Step 5: Put it all together
When it comes to putting the whole thing together, you can either:
a) Glue the base disc to a plain headband
b) Sew a hair comb inside the disc
Some people prefer a hairband because it feels more secure, especially if you have very thin hair and find it difficult to stop a comb from sliding out.
Your questions on DIY fascinators
Let’s dive into some of your frequently asked questions on DIY fascinators.
Are fascinators easy to make?
Making your own fascinator is relatively straightforward. With the right fascinator parts and a bit of creative flair, you can make a headpiece to rival some of the most elaborate at Royal Ascot.
What materials do I need to make a fascinator?
To make your own fascinator, you’ll need a base disc, a headband or hair comb, hot glue, and/or needle and thread.
This is a basic list of fascinator materials. You’ll also need fabric (crinoline is ideal), ribbon, feathers, flowers, and sequins or gems for the decoration. As long as they fit your colour scheme, this is a great opportunity to use up those odds and ends left over from other DIY projects.
Do you hide the band on a fascinator?
Where a fascinator is attached to a headband, most of the band is hidden under the hair so it won’t be seen.
The band is usually the same colour as the rest of the headpiece to create one seamless piece. If it is a different colour, you can cover it with material to match the rest of the fascinator.
How do you wear a fascinator?
Wearing a fascinator involves securing it to your hair in a way that complements your hairstyle and overall look.
- - For headbands: Slide the headband into your hair so that it sits comfortably and securely. Position the most decorative part of your fascinator so it sits just off-centre.
- - For hair combs: Insert the comb into your hair in your preferred place, ensuring it grips firmly. Your hairstyle will determine the best place to wear the fascinator.
Making a fascinator – the key takeaway
You don't need to be a sewing superstar to make your own fascinator. With your materials in hand, all it takes is patience and a touch of creativity to succeed.
The main challenge is deciding where to begin. Doing some research before diving in is a smart move. If you already have a vision of what you want to make, you're just a few steps away from bringing it to life.


